Kubeadm 是一个K8s 部署工具,提供kubeadm init 和kubeadm join,用于快速部署Kubernetes 集群。
完整的卸载k8s(有需要的话)
1 | # 首先清理运行到k8s群集中的pod,使用 |
安装kube集群(4节点)
k8s重置命令(如果初始化的过程出现了错误就使用重置命令):kubeadm reset
准备工作(所有的节点都执行)
编辑4台服务器的 /etc/hosts 文件 ,添加下面内容(每个节点都执行一遍):
1 | 192.168.2.1 node1 |
设置hostname(以node1为例):
1 | hostnamectl set-hostname node1 # node1 是自定义名字 |
或者修改 /etc/hostname 文件,写入node1(其他的子节点都一样):
1 | vim /etc/hostname |
修改之后/etc/hostname的内容为:
1 | node1 |
所有节点执行时间同步:
1 | # 启动chronyd服务 |
所有节点禁用SELinux和Firewalld服务:
1 | systemctl stop firewalld |
所有节点禁用swap分区:
1 | # 临时禁用swap分区 |
所有节点添加网桥过滤和地址转发功能:
1 | cat > /etc/sysctl.d/kubernetes.conf << EOF |
然后所有节点安装docker-ce(略)
需要注意的是要配置docker的cgroupdriver:
打开docker配置文件进行修改,该文件默认情况下不存在,可以新建一个,不同操作系统的文件位置不一样。
1 | vim /etc/docker/daemon.json |
1 | { |
重新加载配置并重启服务:
1 | systemctl daemon-reload |
最终配置文件内容如下:
1 | { |
所有节点的kubernetes镜像切换成国内源:
1 | cat > /etc/yum.repos.d/kubernetes.repo << EOF |
所有节点安装指定版本 kubeadm,kubelet 和 kubectl(我这里选择1.23.0版本的):
1 | yum install -y kubelet-1.23.0 kubeadm-1.23.0 kubectl-1.23.0 |
更改kubelet的容器路径(如果需要的话,不需要可以跳过)
1 | vim /usr/lib/systemd/system/kubelet.service.d/10-kubeadm.conf |
修改完之后配置文件如下:
1 | [Service] |
使配置生效:
1 | systemctl daemon-reload |
部署Kubernetes集群
覆盖kubernetes的镜像地址(只需要在master节点上操作初始化命令)
- 首先要覆盖kubeadm的镜像地址,因为这个是外网的无法访问,需要替换成国内的镜像地址,使用此命令列出集群在配置过程中需要哪些镜像:
1 | [root@node1 home]# kubeadm config images list |
- 更改为阿里云的镜像地址:
1 | [root@node1 home]# kubeadm config images list --image-repository registry.aliyuncs.com/google_containers |
- 然后将镜像手动拉取下来,这样在初始化的时候回更快一些(还有一个办法就是直接在docker上把镜像pull下来,docker只要配置一下国内源即可快速的将镜像pull下来):
1 | [root@node1 home]# kubeadm config images pull --image-repository registry.aliyuncs.com/google_containers |
初始化kubernetes(只需要在master节点上操作初始化命令)
初始化 Kubernetes,指定网络地址段 和 镜像地址(后续的子节点可以使用join命令进行动态的追加):
1 | [root@node1 home]# kubeadm init \ |
执行完之后要手动执行一些参数(尤其是 加入集群的join命令 需要复制记录下载):
1 | [addons] Applied essential addon: kube-proxy |
执行参数:
1 | [root@node1 home]# mkdir -p $HOME/.kube |
加入以下这段:
1 | # 超级用户变量 |
激活 .bash_profile:
1 | [root@node1 home]# source /root/.bash_profile |
这段要复制记录下来(来自k8s初始化成功之后出现的join命令,需要先配置完Flannel才能加入子节点),后续子节点加入master节点需要执行这段命令:
1 | kubeadm join 192.168.2.1:6443 --token ochspx.15in9qkiu5z8tx2y \ |
设定kubeletl网络(主节点部署)
部署容器网络,CNI网络插件(在Master上执行,著名的有flannel、calico、canal和kube-router等,简单易用的实现是为CoreOS提供的flannel项目),这里使用Flannel实现。
下载kube-flannel.yml:
1 | [root@node1 home]# wget https://raw.githubusercontent.com/flannel-io/flannel/master/Documentation/kube-flannel.yml |
然后修改配置文件,找到如下位置,修改 Newwork 与执行 kubeadm init 输入的网段一致:
1 | net-conf.json: | |
修改配置之后安装组件(如果安装的时候卡在pull镜像的时候,试一试手动用docker将镜像拉取下来):
1 | [root@node1 home]# kubectl apply -f kube-flannel.yml |
查看flannel pod状态(必须要为Running状态,如果kube-flannel起不来,那么就用kubectl describe pod kube-flannel-ds-f5jn6 -n kube-flannel命令查看pod起不来的原因,然后去搜度娘获取解决方案):
1 | [root@node1 home]# # 必须所有的容器都是Running |
查看通信状态:
1 | [root@node1 home]# kubectl get pod -n kube-system |
查看节点状态(此时还只有主节点,还没添加子节点):
1 | [root@node1 home]# kubectl get node |
至此 K8s master主服务器 已经部署完成!
子节点加入集群(在子节点上操作)
初始化会生成join命令,需要在子节点执行即可,以下token作为举例,以实际为主,例如:
1 | [root@node2 home]# kubeadm join 192.168.2.1:6443 --token ochspx.15in9qkiu5z8tx2y --discovery-token-ca-cert-hash sha256:1f31202107af96a07df9fd78c3aa9bb44fd40076ac123e8ff28d6ab691a02a31 |
默认的 join token 有效期限为24小时,当过期后该 token 就不能用了,这时需要重新创建 token,创建新的join token需要在主节点上创建,创建命令如下:
1 | [root@node1 home]# kubeadm token create --print-join-command |
加入之后再在主节点查看集群中节点的状态(必须要都为Ready状态):
1 | [root@node1 home]# kubectl get nodes |
如果所有的节点STATUS都为Ready的话,那么到此,所有的子节点加入完成!
删除子节点(在master主节点上操作)
1 | # kubectl drain <node name> --delete-local-data --force --ignore-daemonsets |
然后在删除的子节点上操作重置k8s(重置k8s会删除一些配置文件),这里在node3子节点上操作:
1 | [root@node3 home]# # 子节点重置k8s |
然后在被删除的子节点上手动删除k8s配置文件、flannel网络配置文件 和 flannel网口:
1 | [root@node3 home]# rm -rf /etc/cni/net.d/ |
部署k8s dashboard(这里使用Kubepi)
Kubepi是一个简单高效的k8s集群图形化管理工具,方便日常管理K8S集群,高效快速的查询日志定位问题的工具
部署KubePI(随便在哪个节点部署,我这里在主节点部署):
1 | [root@node1 home]# docker pull kubeoperator/kubepi-server |
登录:
1 | # 地址: http://192.168.2.1:8000 |
填写集群名称,默认认证模式,填写apisever地址及token:
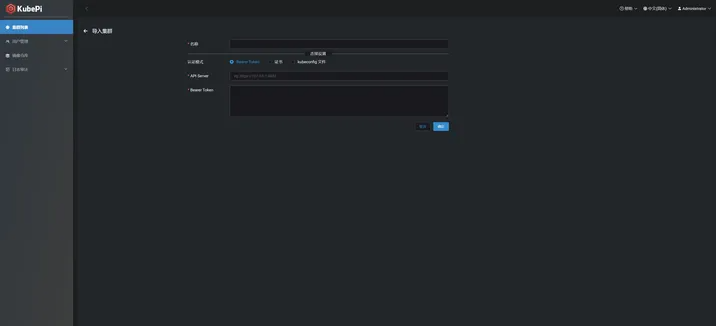
kubepi导入集群:
获取登录需要用到的ip地址和登录token:
1 | [root@node1 home]# # 在 k8s 主节点上创建用户,并获取token |
将上面获取的api地址和token填入页面即可,name可以自己随意取。
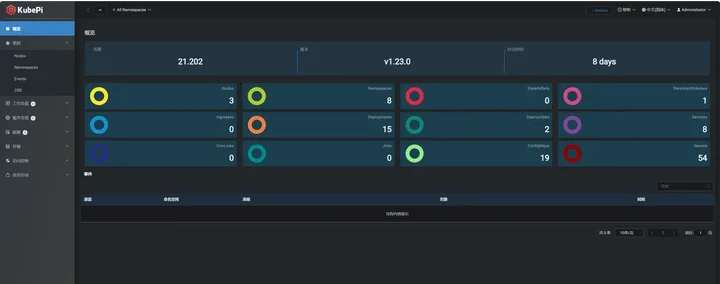
到此,KubePI安装完成!
安装metrics k8s集群监控插件
k8s metrics插件提供了 top 命令可用于统计 k8s集群资源 的使用情况,它包含有 node 和 pod 两个⼦命令,分别显⽰ node 节点和 Pod 对象的资源使⽤信息。
kubectl top 命令依赖于 metrics 接口。k8s 系统默认未安装该接口,需要单独部署:
1 | [root@k8s-master k8s-install]# kubectl top pod |
下载部署文件
下载 metrics 接口的部署文件 metrics-server-components.yaml
1 | [root@k8s-master k8s-install]# wget https://github.com/kubernetes-sigs/metrics-server/releases/latest/download/components.yaml -O metrics-server-components.yaml |
修改镜像地址
将部署文件中镜像地址修改为国内的地址。大概在部署文件的第 140 行。
原配置是:
1 | image: k8s.gcr.io/metrics-server/metrics-server:v0.6.1 |
修改后的配置是:
1 | image: registry.cn-hangzhou.aliyuncs.com/google_containers/metrics-server:v0.6.1 |
可使用如下命令实现修改:
1 | sed -i 's/k8s.gcr.io\/metrics-server/registry.cn-hangzhou.aliyuncs.com\/google_containers/g' metrics-server-components.yaml |
部署 metrics 接口
1 | [root@k8s-master k8s-install]# kubectl create -f metrics-server-components.yaml |
查看该 metric pod 的运行情况:
1 | [root@k8s-master k8s-install]# kubectl get pods --all-namespaces | grep metrics |
查看该 pod 的情况,发现是探针问题:Readiness probe failed: HTTP probe failed with statuscode: 500
1 | [root@k8s-master k8s-install]# kubectl describe pod metrics-server-6ffc8966f5-84hbb -n kube-system |
基本可以确定 pod 异常是因为:Readiness Probe 探针检测到 Metris 容器启动后对 http Get 探针存活没反应,具体原因是:cannot validate certificate for 192.168.100.22 because it doesn’t contain any IP SANs” node=”k8s-slave2”
查看 metrics-server 的文档(https://github.com/kubernetes…),有如下一段说明:
1 | Kubelet certificate needs to be signed by cluster Certificate Authority (or disable certificate validation by passing |
意思是:kubelet 证书需要由集群证书颁发机构签名(或者通过向 Metrics Server 传递参数 –kubelet-insecure-tls 来禁用证书验证)。
由于是测试环境,我们选择使用参数禁用证书验证,生产环境不推荐这样做!!!
在大概 139 行的位置追加参数:
1 | spec: |
apply 部署文件:
1 | [root@k8s-master k8s-install]# kubectl apply -f metrics-server-components.yaml |
metrics pod 已经正常运行:
1 | [root@k8s-master k8s-install]# kubectl get pod -A | grep metrics |
再次执行 kubectl top 命令成功:
1 | [root@k8s-master k8s-install]# kubectl top pod |
k8s常用命令集合
k8s常用命令集合:
1 | # 查看当前集群的所有的节点 |